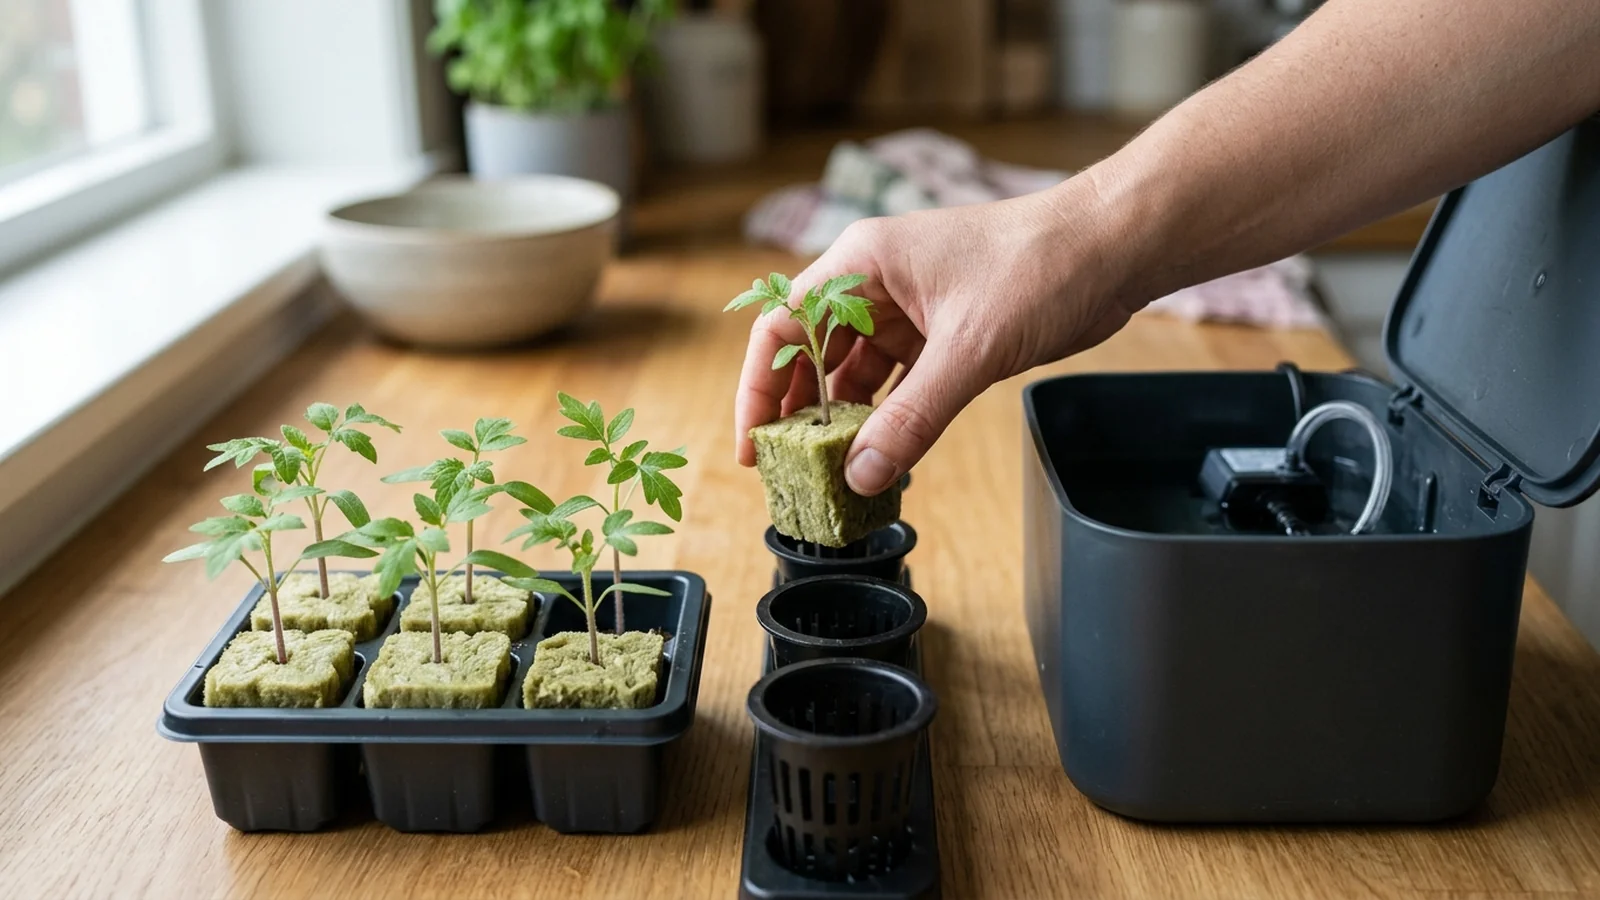
A hydroponic seedling is ready to transplant when it has grown past its two seed leaves into true leaves and shows white roots emerging from the bottom of its plug — not on a fixed schedule. Move it too early and the roots cannot reach the reservoir. Move it too late and they outgrow the cube and tangle. The checks below work the same way whether you are moving lettuce, basil, kale, or a tomato start: read the plant’s own signals, protect the roots during the move, and set the new reservoir up before the seedling ever leaves the nursery tray.
If you have not started seeds yet, germinating lettuce seeds for hydroponics covers the medium, light, and humidity a seedling needs before it ever reaches this stage.
The two-marker rule: when any seedling is ready to move
Skip the calendar. Two physical markers matter more than days-since-sowing, because germination speed shifts with room temperature, light, and the crop itself.
- True leaves, not cotyledons. The first leaves a seed pushes out are smooth, round cotyledons that do not count toward readiness. Wait until true, textured, adult-shaped leaves have appeared — the University of Kentucky’s own readiness point for lettuce is 3 to 4 of them.
- Visible roots at the plug’s edge. Turn the cube or plug over. You need to see white roots actively emerging from the bottom or sides, not just assume they are in there.
The University of Kentucky’s extension guide puts lettuce at roughly 3 to 4 true leaves with roots visibly emerging, usually 14 to 21 days after seeding. That day count is specific to lettuce grown under Kentucky’s reference conditions; the two markers themselves — true leaves plus visible roots — are the general rule this checklist is built around, whatever the tray holds.
Check root health before you move anything
A stressed seedling with weak roots is a poor transplant candidate no matter how many true leaves it has. Before moving anything, look at the roots themselves:
- Color: healthy roots are white or pale cream. A slight tan tint from organic nutrients is normal.
- Texture: firm, distinct strands. Roots that are soft, slimy, or clumped together are already compromised — University of Kentucky Extension describes Pythium-infected roots as soft, mushy, and greyish-brown, with the outer layer sloughing off.
- Smell: clean or mildly earthy is fine. A sour or swampy smell means something is already wrong in the tray water.
A seedling with brown, mushy roots will not improve once it reaches the main system. It usually gets worse, because the main reservoir is bigger and slower to correct than a small nursery tray. If your roots already show these signs, work through hydroponic root rot: brown roots, slimy roots, and prevention before transplanting, not after.
Prep the plug and the reservoir first
Two things need to be ready before the seedling leaves its tray, not while it sits exposed to air.
The plug itself. For deep water culture or NFT, use a bonded plug — a rockwool cube or rapid rooter that holds its shape once wet. Kentucky’s extension guide recommends bonded 1-inch plugs specifically for water-based systems because they hold together when submerged; a loose or crumbling medium falls apart in the reservoir and clogs pumps. That plug should already have been prepared at seeding, not now: University of Minnesota Extension’s general rule for any propagation medium is to soak it in water for 24 hours and change that water before a seed goes in, and UF/IFAS Extension gives the reason for rockwool specifically, which is that the material carries its own alkalinity that needs rinsing out first. A plug that skipped that step is carrying it into the reservoir instead.
The reservoir. Mix the new nutrient solution before the seedling arrives, not after. Oklahoma State’s extension guide recommends setting EC first and adjusting pH second, and a meter that has not been checked in a while is the wrong place to discover that on transplant day, since a bad first reading sends every correction after it in the wrong direction. If meters are overdue for calibration, choosing and calibrating a pH and EC meter covers the routine.
Minimize transplant shock
The move itself is short but risky. A few habits reduce the odds of losing a seedling in the first day or two:
- Match water level to the plug, not the plant. Set the reservoir so the water just touches the bottom of the net cup. A plug that stays fully submerged loses access to oxygen at the stem, and the University of Minnesota is direct about the consequence: roots that cannot get oxygen at the root zone can develop root rot.
- Handle the plug, not the stem. Lift by the cube or net cup instead of the stem itself, which bruises or snaps under its own weight once wet.
- Work quickly and keep roots moist. Do not leave a bare-root seedling sitting in open air while the rest of the system gets drilled or mixed. Have the destination ready first, then move the plant.
- Expect a short adjustment period. A newly transplanted seedling can look slightly wilted for the first day as it adjusts from a humid tray to open water flow. That is normal, and different from the sustained yellowing or collapse that signals a real problem.
System-specific handling
Timing tolerance is not identical across systems.
- Deep water culture and Kratky are the most forgiving. Neither depends on a pump running continuously, so a slightly early or late transplant is easier to recover from by adjusting the water level after the fact. University of Minnesota Extension’s target once roots grow past the net pot is proportional rather than a fixed depth — keep roughly one-third to one-half of the root mass submerged.
- NFT depends on a continuous thin film of moving solution. The University of Minnesota’s own trial found 8 to 10 ounces of solution per minute ideal for lettuce, running from a 25-gallon reservoir. Minnesota does not describe what happens below that rate, but a channel running dry at the base is the failure a freshly transplanted plug is least able to survive.
The printable checklist
Run through this before a single seedling leaves the tray:
| Step | What to check | If it fails |
|---|---|---|
| 1. True leaves | True, textured leaves have appeared beyond the cotyledons (Kentucky uses 3 to 4 for lettuce) | Wait longer, regardless of days since sowing |
| 2. Visible roots | White roots are emerging from the bottom or sides of the plug | Do not transplant yet; the roots cannot reach a reservoir they are not touching |
| 3. Root color and texture | Roots are white or pale cream, firm, and not brown or slimy | Diagnose the root zone before moving; a weak root system gets worse in a bigger reservoir |
| 4. Plug type | The plug is a bonded cube that holds together wet | Swap to a bonded medium before moving into deep water culture or NFT |
| 5. Reservoir mixed | Fresh nutrient solution is mixed, EC set and pH corrected, and meters recently checked | Mix and calibrate before the seedling leaves the tray |
| 6. Water level set | Water touches the bottom of the net cup without submerging the plug | Lower the level before lowering the plant in |
| 7. Handling plan | The seedling can be lifted by the plug, not the stem, and set straight into a destination that is already prepared | Finish system prep first so the seedling is not left exposed |
Print or screenshot this table and check it off tray by tray. Every row here is a condition you can fix before the seedling leaves the tray, which is the only point at which fixing it is cheap.
Common transplant mistakes across crops
- Transplanting on a schedule instead of by the plant. A seedling under bright, warm light can hit both readiness markers a week earlier than one grown cooler and dimmer. Check the plant, not the calendar.
- Spacing every crop the same way. Spacing is set by a crop’s mature canopy, not the seedling in front of you. When to transplant hydroponic lettuce and how far apart to space it gives lettuce’s own spacing figures by variety; treat those numbers as specific to lettuce rather than a general rule for whatever else is in the tray.
- Skipping reservoir prep. Moving a seedling into an unmixed or uncalibrated system means every problem in the first week gets blamed on the plant instead of the water. Hydroponic nutrient basics: EC, pH, dilution, and reservoir stability covers the mixing sequence in more depth.
- Ignoring root color at the moment of transplant. It is the easiest time to catch a problem, because the whole root ball is briefly out of the water and visible in full.
Sources
- University of Kentucky Center for Crop Diversification CCD-CP-63: Hydroponic Lettuce Production in Controlled Environments covers transplant readiness markers, plug type, and timing for lettuce.
- University of Minnesota Extension: Small-scale hydroponics covers substrate soaking, root oxygen and overwatering, and NFT flow rate.
- UF/IFAS Extension HS1422: Growing Lettuce in Small Hydroponic Systems covers why rockwool needs soaking before seeding.
- Oklahoma State University Extension HLA-6722: Electrical Conductivity and pH Guide for Hydroponics covers mixing order and meter calibration before a new reservoir goes into service.
Before and after the move
Get the reservoir and the root system right on both sides of transplant day.
Common questions
How do I know a hydroponic seedling is ready to transplant?
Check for two things regardless of crop: true leaves rather than just the first round cotyledons, and white roots visibly emerging from the bottom or sides of the growing plug. The University of Kentucky places this at roughly 3 to 4 true leaves with roots showing, usually 14 to 21 days after seeding, for lettuce specifically; the two physical markers themselves apply more broadly to seedlings started in the same kind of plug.
Can I transplant before roots show at the bottom of the plug?
It is risky. Without exposed roots, the only way to get the seedling drinking is to raise the water so high it submerges the plug. A fully saturated rockwool cube or rapid rooter cuts off oxygen to the stem, and the same oxygen-starved root zone that the University of Minnesota links to root rot is exactly what that submersion creates.
Does spacing matter the same way for every crop?
No. Spacing is set by the mature size of the plant, not the seedling in front of you, and the ideal distance is different for every crop. Lettuce spacing has its own figures broken out by variety; look those up specifically rather than assuming one crop's spacing applies to another.
How long can a seedling sit out of water during the move?
Keep it short. Move quickly, keep the roots moist and shaded from direct light or heat, and get the seedling into its new position before it wilts. Speed and gentle handling matter more than any specific countdown.
Related guides
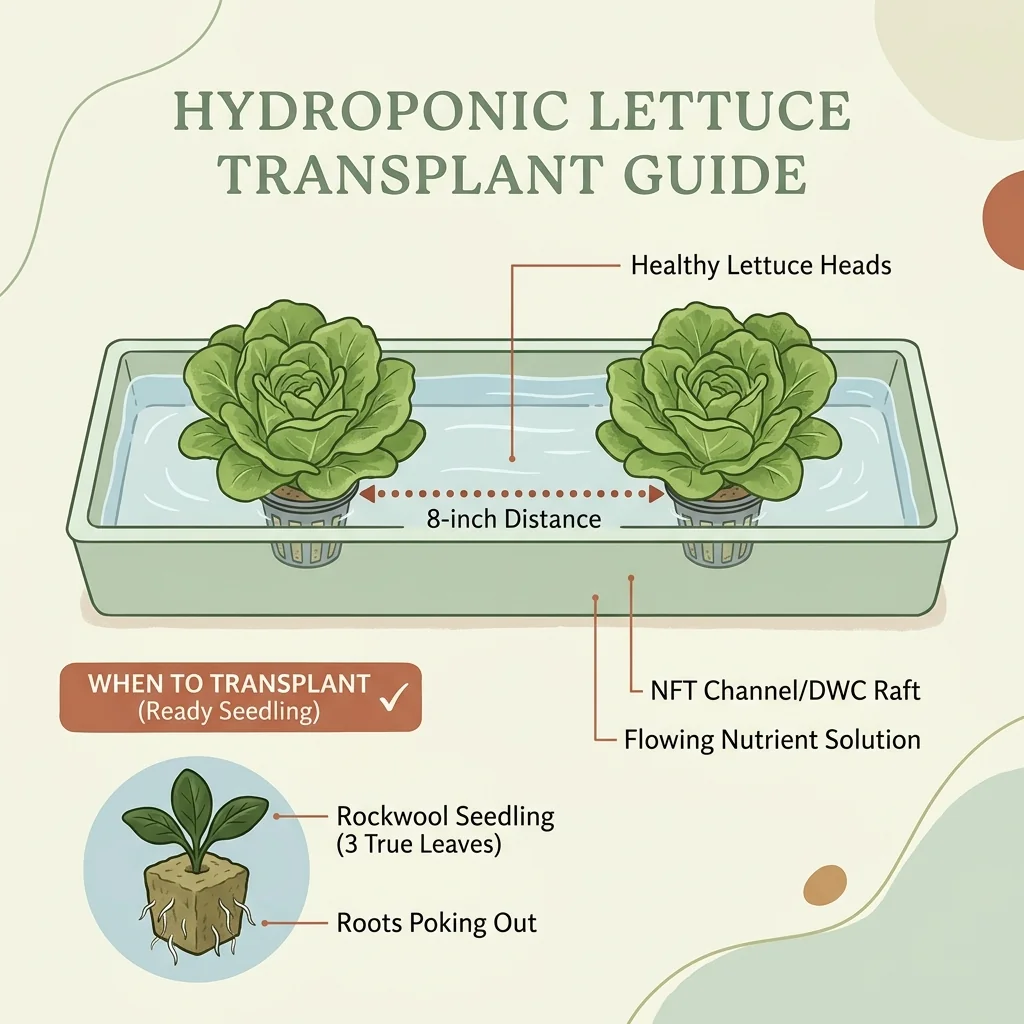
When to transplant hydroponic lettuce and how far apart to space it
Moving your fragile seedling from the nursery tray to the main hydroponic system is a high-risk maneuver. If you move it a day too early, it will drown. If you plant the heads too close together, they will choke each other out. Here are the exact metrics for a perfect transplant.
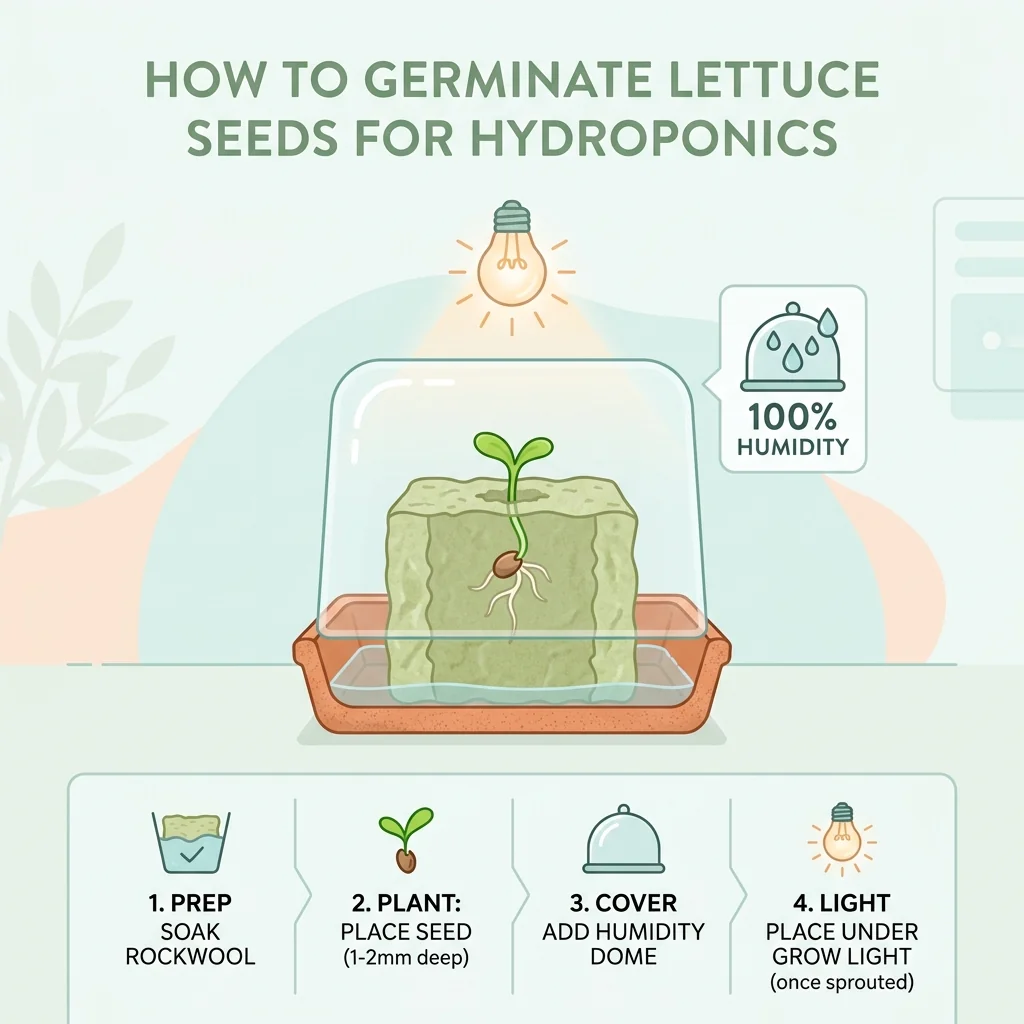
How to germinate lettuce seeds for hydroponics
You cannot start hydroponic seeds in potting soil. The dirt will wash off into your reservoir, clogging your pump and causing a massive bacterial bloom. Here is the sterile, foolproof method to start seeds for water-based growing.
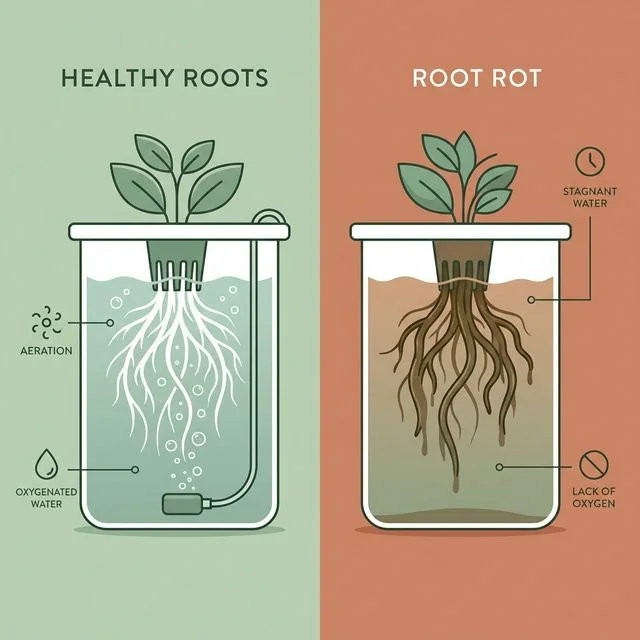
Hydroponic root rot: how to spot it early and stop it
Brown, slimy or swampy-smelling roots mean root rot. Catch it early and fix the conditions behind it — warm water, low oxygen and stagnant flow.