Troubleshoot the system before you change the inputs.
Symptoms
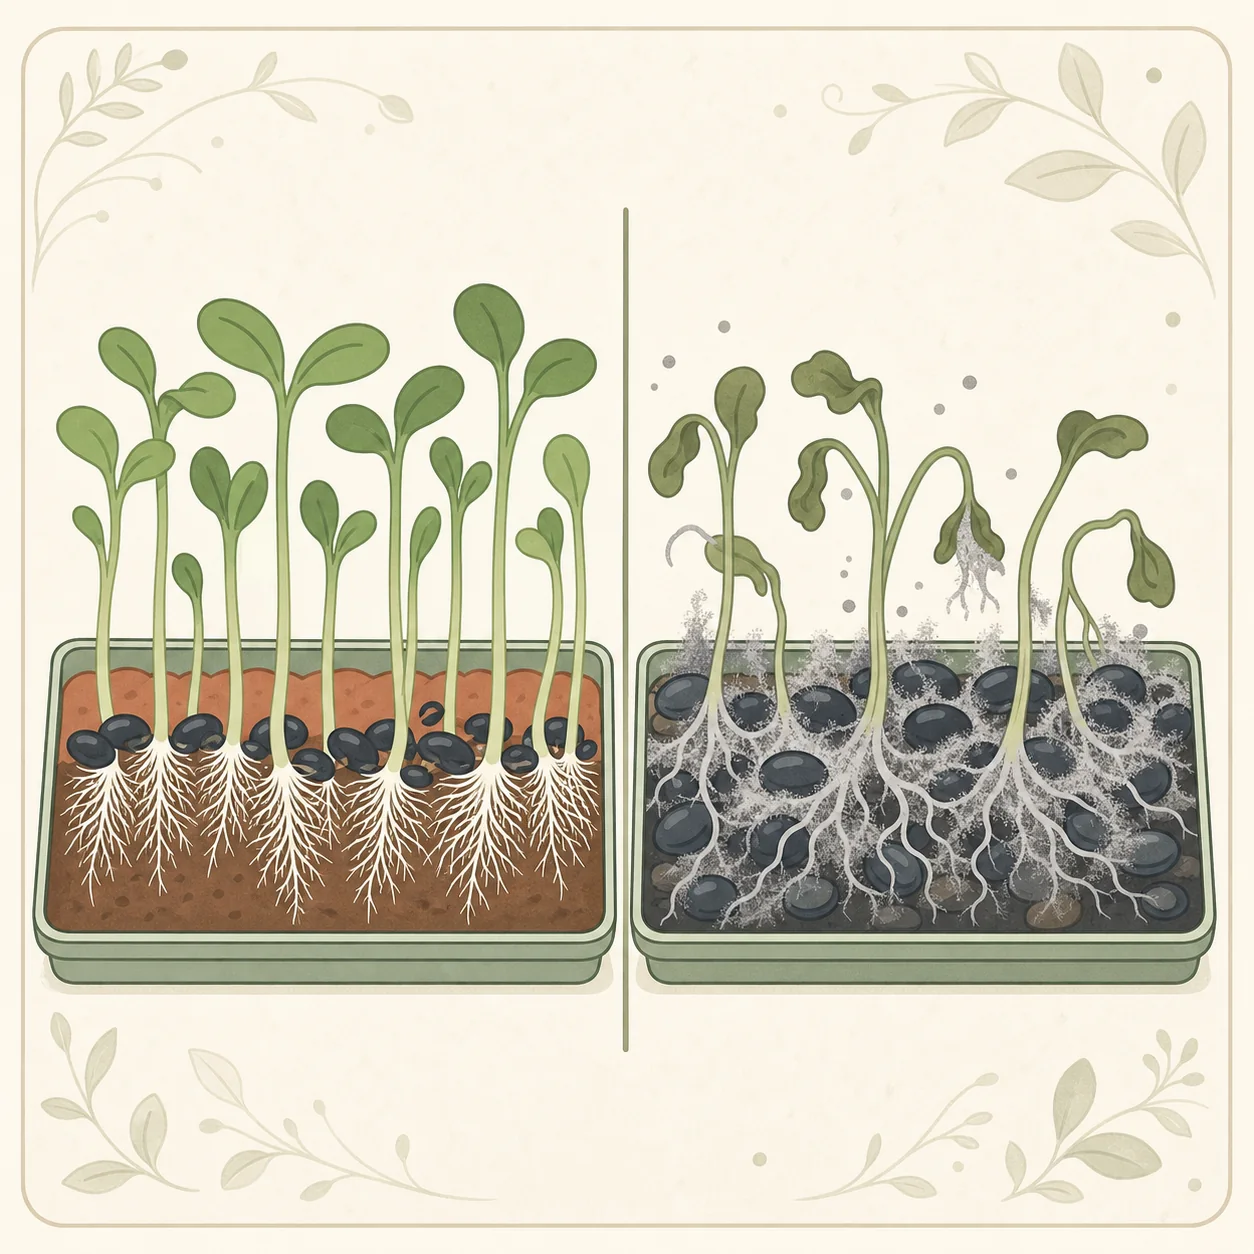
- White fuzz is visible around seeds or roots after germination.
- Patches spread between seed hulls or across the medium.
- Seedlings emerge unevenly, collapse, smell sour, or become slimy.
Possible causes
- Normal root hairs are being mistaken for contamination.
- Excess seed density and water created a persistently wet mat.
- Damping-off pathogens are attacking young stems or roots.
Quick fixes
- Inspect location and uniformity before disturbing the tray.
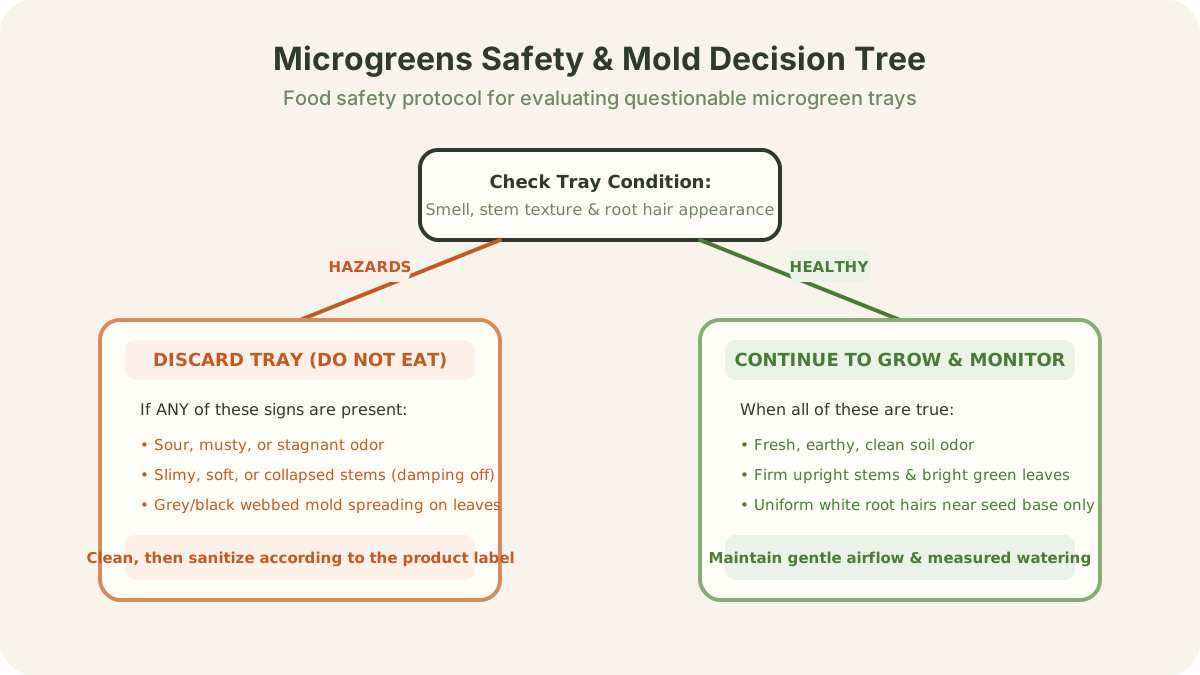
- Discard trays with odor, slime, collapse, or uncertain safety.
- Sanitize equipment and reduce moisture or density on the next sowing.
Root hairs, surface mold, and damping-off
| Clue | Root hairs | Surface mold | Damping-off |
|---|---|---|---|
| Location | Attached evenly to roots | Bridges debris or seeds | At roots and stem base |
| After misting | Temporarily collapses | Usually remains irregular | Tissue stays damaged |
| Seedling health | Upright and firm | May be normal initially | Weak, pinched, or collapsed |
| Decision | Continue and monitor | Discard when contamination is credible | Discard affected tray |
White fuzz in a germinating microgreens tray can be normal root hairs, fungal growth on wet organic matter, or disease affecting seedlings. The safest decision uses several clues together: where the growth begins, whether it is uniform, how seedlings look and smell, and whether tissue is collapsing.
Start with the complete beginner microgreens method. Diagnosis is much easier when seed density, watering, blackout time, tray type, and temperature are recorded rather than guessed afterward.
What healthy root hairs look like
Root hairs are extensions of root cells that increase the surface available for water and nutrient uptake. On newly emerged microgreens they can form a bright white, even halo around each exposed root, especially near the root tip.
They follow individual roots rather than jumping randomly across empty medium. Neighboring seedlings at the same stage often show a similar pattern. When gently misted, the hairs commonly collapse against the root and seem to disappear; they can become visible again as the surface dries.
Healthy seedlings remain upright and firm. The tray smells like moist seed or growing medium, not sour fermentation or decay.
What surface mold looks like
Surface fungal growth is often irregular. Threads may bridge seed hulls, dead seeds, medium, or patches of seedlings. Color can be white at first, so color alone is weak evidence. Growth that expands across a marked boundary or concentrates around decomposing material deserves caution.
A stale, musty, sour, or rotten odor is a stronger warning. Slime, discolored seed masses, and persistent wetness make the tray unsuitable for casual rescue. Do not taste questionable microgreens to test safety.
Because microgreens are eaten young and often raw, the cost of discarding one tray is lower than the cost of gambling on visible contamination.
Recognize damping-off
Root hairs do not constrict stems or make seedlings mushy, so a spreading patch of water-soaked, pinched stems at the medium line is a different problem: discard that tray, because spraying the top does not restore damaged vascular tissue. Sanitize the tray and start the next sowing in a fresh, fast-draining mix rather than treating the surface.
Use a safe decision sequence
First, stop misting and inspect under bright light without touching the growth. Note whether fuzz belongs to individual roots or crosses debris. Photograph the patch and smell the tray from a normal distance; do not inhale closely.
Second, mist a small suspected root area with clean water. Root hairs should flatten toward the root, while irregular bridging growth is less likely to resolve into a clear root outline. This is supporting evidence, not a laboratory test.
Third, inspect stems at the medium line and lift only one edge seedling if necessary. Firm white roots and upright stems support normal development. Brown, mushy roots, pinched stems, slime, and collapse support disposal.
When the evidence remains uncertain, discard the crop. Do not harvest around a moldy center and assume the outer area is independent.
Why trays develop mold problems
High seed density traps moisture and dead hulls. Excess water fills air spaces in the medium. Stagnant air after emergence slows surface drying. Dirty trays and reused media add inoculum. Old, damaged, or poorly stored seed can germinate unevenly and leave more decaying material.
The blackout period is naturally humid, but it should not become a prolonged warm, waterlogged enclosure. Once shoots emerge and the crop calls for light, provide the correct light and gentle room airflow.
Prevent the next tray
Clean and sanitize reusable equipment with a food-production-appropriate method, following the sanitizer label for concentration and contact time. Begin with potable water and seed sold for sprouting or microgreen production from a traceable supplier.
Measure seed rather than covering the tray by eye. Different crops need different densities because seed size and shoot structure vary. Level the medium so water does not collect in low pockets.
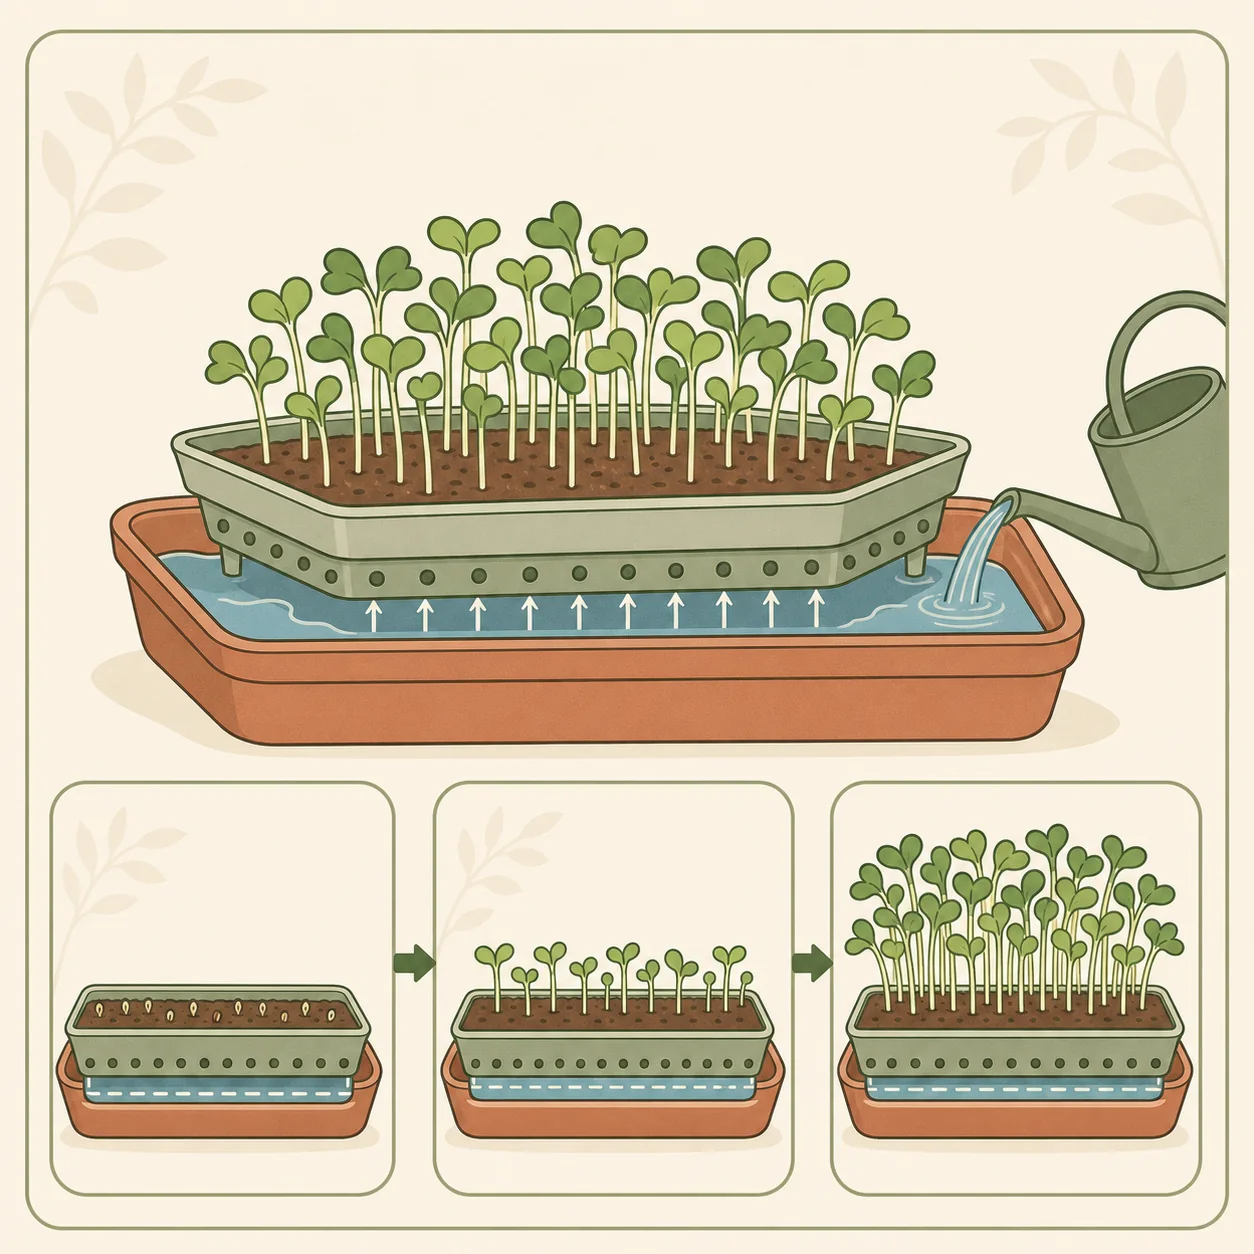
After establishment, use bottom watering to keep foliage and seed hulls drier. Water only what the tray will use, then drain excess. Strong light and reasonable spacing help the crop grow through the vulnerable stage quickly.
Keep a grow log: crop and lot, seed weight, soak time if used, sowing date, blackout duration, first light, watering volume, room temperature, and harvest date. When a failure repeats, the log reveals what changed.
Clean up after a failed tray
Bag the crop and medium. Wash loose organic matter from trays before sanitizing, because debris can shield organisms from the sanitizer. Clean the solid and perforated tray, weights, tools, shelf, and any fan guard exposed to debris.
Let equipment dry fully before storage. Do not immediately sow the same questionable seed lot across several trays; run a small isolated test or contact the supplier.
Common mistakes
- Calling every root halo mold from a single photo.
- Trying to mask odor by rinsing the tray.
- Harvesting the unaffected-looking edge of a contaminated mat.
- Reusing medium from a failed tray.
- Increasing fan speed while leaving excess water in the bottom tray.
- Treating visible mold without correcting seed density and sanitation.
Separate poor germination from disease
A bare patch can result from old seed, uneven sowing, poor seed contact, or disease. Count ungerminated seeds in a defined area rather than assuming mold. Run a separate germination test from the same lot on clean, moist paper. If germination is poor without decay, seed storage may be responsible. If seeds become soft, odorous, or visibly colonized under clean conditions, stop using the lot and contact the supplier.
Photograph trays consistently
Take one full-tray image and one close image under neutral white light each day from emergence to harvest. Colored lamps and heavy sharpening can make normal hairs appear alarming. Include a ruler or hull for scale and record whether the picture was taken before or after watering.
Do not use appearance as a complete safety test
No visible mold does not prove a raw crop is free of harmful microorganisms, and a normal smell is not a laboratory result. Keep pets, dirty tools, raw compost, and splash from other plants away from growing and harvest areas. Wash hands before handling seed, trays, or greens.
People at higher risk from foodborne illness should follow current public-health advice on raw sprouts and microgreens. Good hygiene reduces risk; it does not sterilize the food.
Decide at tray level
Microgreens share a dense canopy, root mat, water path, and handling history. Cutting around credible mold or damping-off is therefore a poor default. Discard the whole tray when contamination, slime, sour odor, or spreading collapse is present. Record the failure, clean equipment, and change one or two likely causes on the next small batch.
Sources and further reading
- University of Minnesota Extension: How to prevent seedling damping-off describes characteristic stem, root, emergence, and collapse symptoms.
- Penn State Extension: Ensuring Food Safety in Microgreens Production provides food-safety context for crops commonly eaten raw.
Build a repeatable microgreens process
Start with the full grow method, appropriate supplies, lighting, and controlled bottom watering.
Common questions
Do root hairs disappear when sprayed with water?
They often collapse against the root and become much less visible when wet, then reappear as they dry. Use this only as one clue; odor, spread pattern, and seedling health matter too.
Can I wash mold off microgreens and eat them?
Washing is not a reliable rescue for a visibly moldy or deteriorating tray. Discard contaminated microgreens, clean the equipment, and correct the next grow.
Is every white growth damping-off?
No. Normal root hairs are common, while damping-off is associated with poor emergence, water-soaked or constricted stems, root decay, and seedling collapse.
Related guides
How to bottom-water microgreens without soaking the tray
Bottom watering is a controlled transfer, not permanent standing water. Add a measured amount, let the medium absorb it, and drain what remains.

Microgreens light requirements and a simple setup
Microgreens are kept dark to germinate, then need good light to stay short and green. Here is how much light they need and the simplest windowsill or LED setup.
What do you need to grow microgreens? A short list
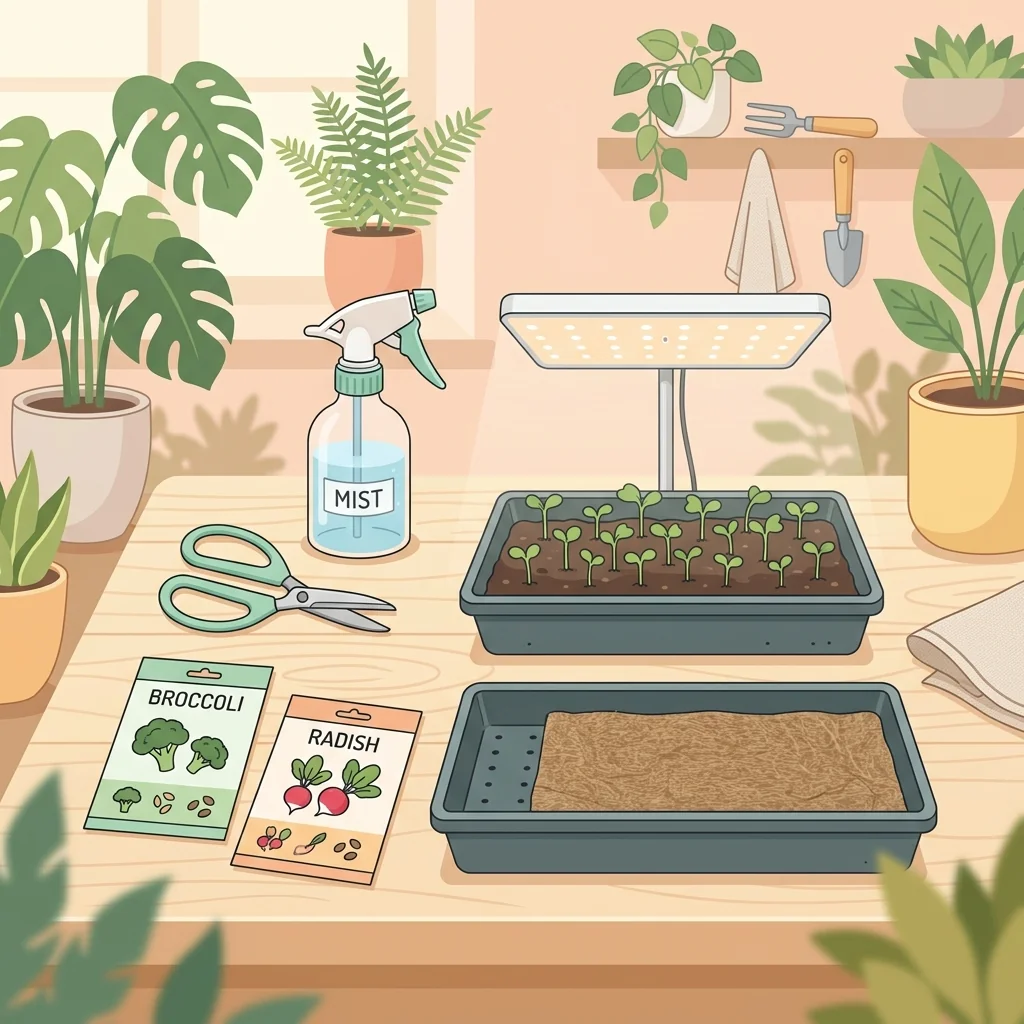
The microgreens supply list is short: tray, medium, seeds, spray bottle, light, scissors. Here is exactly what to get for your first setup and what not to waste money on.