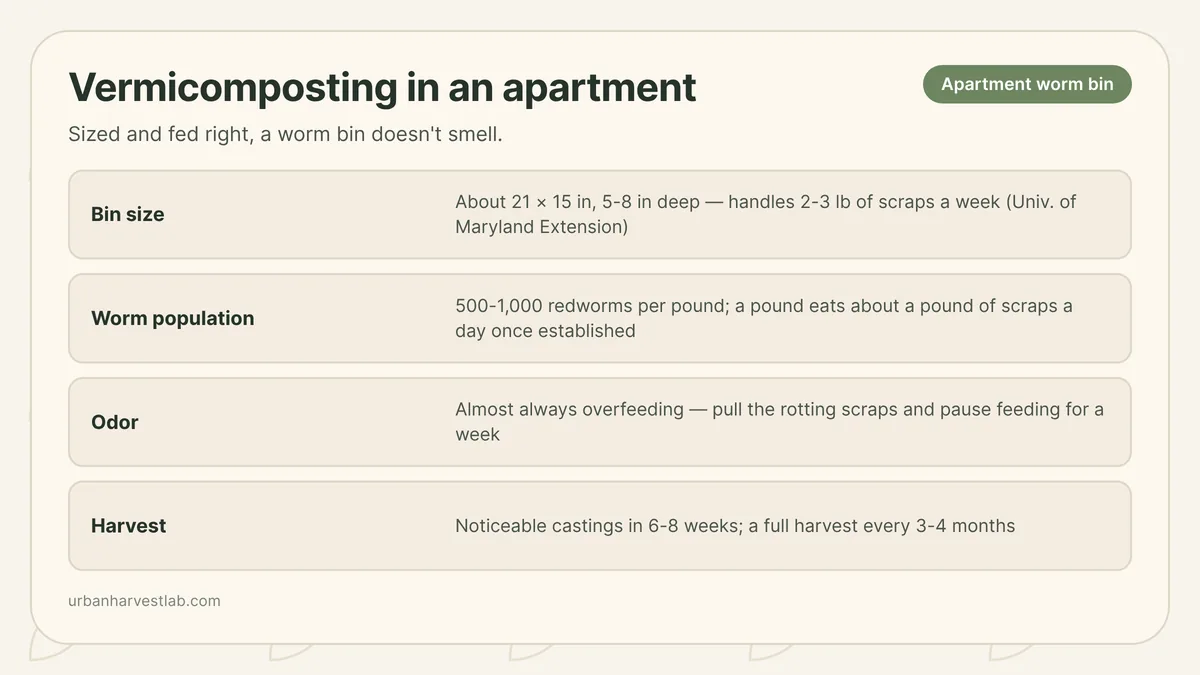
What a worm bin needs and produces
| Factor | Worm bin (vermicomposting) |
|---|---|
| Setup | Ventilated bin, moist bedding, a starter population of redworms |
| Feeding rules | Bury scraps under bedding; avoid overloading |
| Time to usable output | 6-8 weeks for a noticeable amount, 3-4 months per full harvest |
| What you get | Finished castings, ready to use directly |
| Odor if managed correctly | None; smell signals overfeeding |
A worm bin the right size for your kitchen scraps, fed on a schedule instead of on impulse, runs in an apartment closet or under a sink without smelling. Size the bin to match how much you actually throw away, keep the worm population and the food supply matched, and bury scraps under bedding rather than leaving them exposed. Odor is not a mystery to troubleshoot after the fact — it has one dominant cause, and it is preventable from the first week.
Vermicomposting turns kitchen scraps into castings using worms living inside a bedding-filled bin. If you already have finished castings and want the dose for a potting mix, that is on worm castings for containers.
Sizing the bin to your kitchen
University of Maryland Extension describes a working indoor bin at roughly 21 by 15 inches and 5 to 8 inches deep — about 2.2 square feet of surface — sized to process 2 to 3 pounds of kitchen scraps a week. That footprint fits under a sink, in a closet, or on a covered balcony, which is the whole appeal for an apartment.
Match the bin to your household’s actual scrap volume before you buy anything bigger. A larger bin does not process more waste unless you also add more worms and bedding to match it; an oversized bin with too few worms just sits half-empty and holds excess moisture longer than it should.
Use a lidded container with ventilation holes, either a single tote or a stacking tray system, lined with moistened bedding — shredded newspaper, cardboard, or coir are typical choices. Bedding does two jobs at once: it gives the worms somewhere to live that isn’t just food, and it absorbs excess moisture so the bin doesn’t turn anaerobic.
Choosing and sizing the worm population
Redworms, often sold as red wigglers, are the worm extension guidance specifies for an indoor bin, kept in the 55-75°F to 55-80°F range that matters for where the bin sits in an apartment. University of Maryland Extension states that 500 to 1,000 individual worms make up a pound of redworms, and a pound of established worms consumes roughly one pound of raw organic matter daily.
That daily-pound figure describes an established colony, not a bin on day one. Start new worms with less food than their theoretical capacity and increase the feeding rate as the population visibly grows and the previous feeding disappears. Overestimating what a small starter population can eat is the most common way a new bin ends up smelling in its first month.
What to feed, and how to bury it
Feed 2 to 3 times a week, burying scraps under the bedding rather than leaving them on the surface, per University of Maryland Extension. Burying does two things: it keeps fruit flies from finding exposed food, and it puts the scraps where the worms already are instead of making them travel to the surface.
Good candidates are fruit and vegetable trimmings, coffee grounds with filters, crushed eggshells, and shredded paper or cardboard as a carbon source between feedings. Chop or tear larger pieces before burying them — smaller surface area breaks down faster and gives worms less to avoid.
Skip meat, dairy, oily foods, and heavily processed leftovers. These attract pests and rot before the worms can process them, and rotting food is the direct cause of the odor problem below.
Temperature: the range worms actually tolerate
Redworms do best kept indoors within 55 to 75°F, per University of Maryland Extension, though NC State Extension gives a slightly wider working range of 55 to 80°F. Either figure is a reasonable target for a bin kept somewhere in a normal apartment’s temperature swing — a closet, a cabinet, or a shaded balcony corner that doesn’t bake in direct sun or freeze overnight.
Extremes outside that band slow the worms down or kill them outright, so avoid placing the bin next to a heat vent, a sunny window, or an exterior wall that gets cold in winter.
Odor: the fix is feeding, not ventilation
The entire reason vermicomposting suits an apartment is that a correctly run bin does not smell. When one does, University of Maryland Extension names the cause plainly: too many food scraps added at one time. The fix is equally direct — remove the rotting material and pause feeding for about a week before resuming.
That single mechanism covers most odor complaints. If a bin starts smelling, resist the urge to add more bedding, ventilation holes, or a different food type as a workaround; check first whether you’ve been feeding faster than the worm population can keep up, and scale the feeding rate back down to what the colony was actually eating before the smell started.
Fruit flies are a related but separate nuisance — they’re drawn to exposed food, not to a properly buried feeding, so consistent burying under bedding solves both problems at once.
Harvesting the castings
University of Maryland Extension puts the timeline at 6 to 8 weeks for a noticeable amount of vermicompost to accumulate, with a full harvest cycle every 3 to 4 months. Two harvest methods work:
- Migration method: push the finished material to one side of the bin and add fresh bedding and food only to the other side. Worms migrate toward the food over a few months, per University of Maryland Extension — the slower of the two methods, which is why the dump-and-scrape pass exists for anyone who wants castings sooner — leaving the older side largely worm-free and ready to remove.
- Dump-and-scrape method: dump the entire bin contents onto a tarp or plastic sheet in a lit area and scrape off the top layer in repeated passes. Worms avoid light and burrow down, so each pass exposes fewer worms in the material you collect, and you rebuild the bin with the worms left in the final pile.
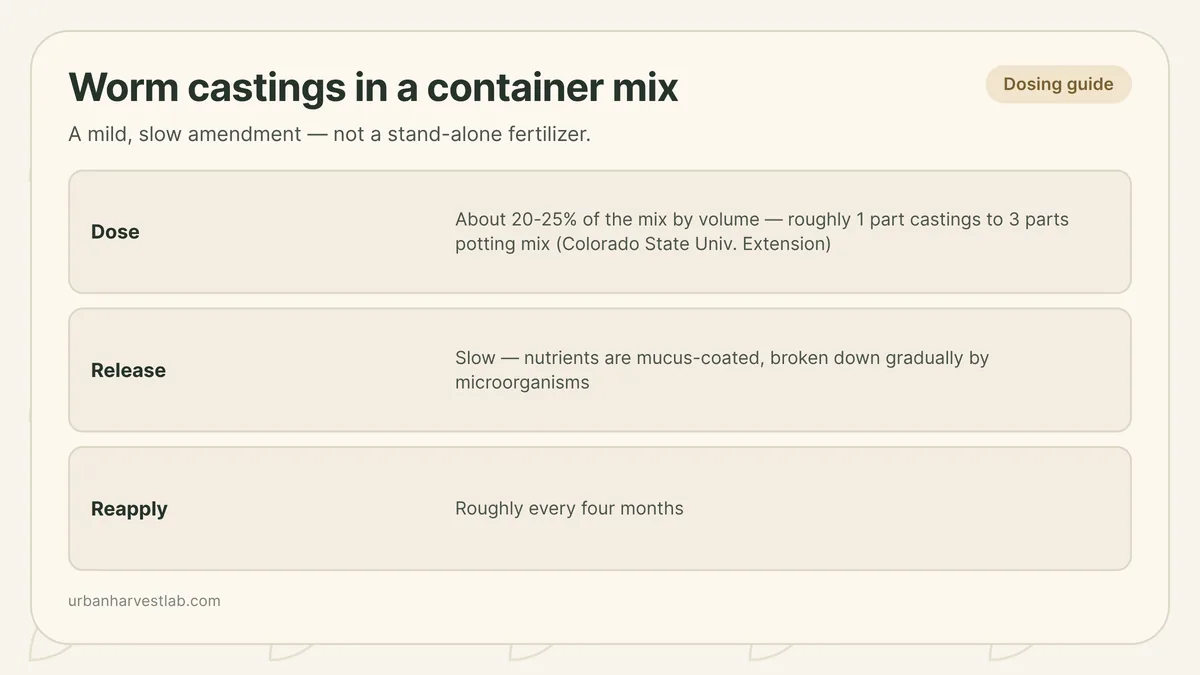
Either method leaves you with finished castings and a bin ready to restart. What to do with those castings — how much to work into a potting mix and how often to reapply — is covered on worm castings for containers, since the dosing and reuse questions are distinct from running the bin that produced them.
Vermicomposting vs. bokashi, and when each fits
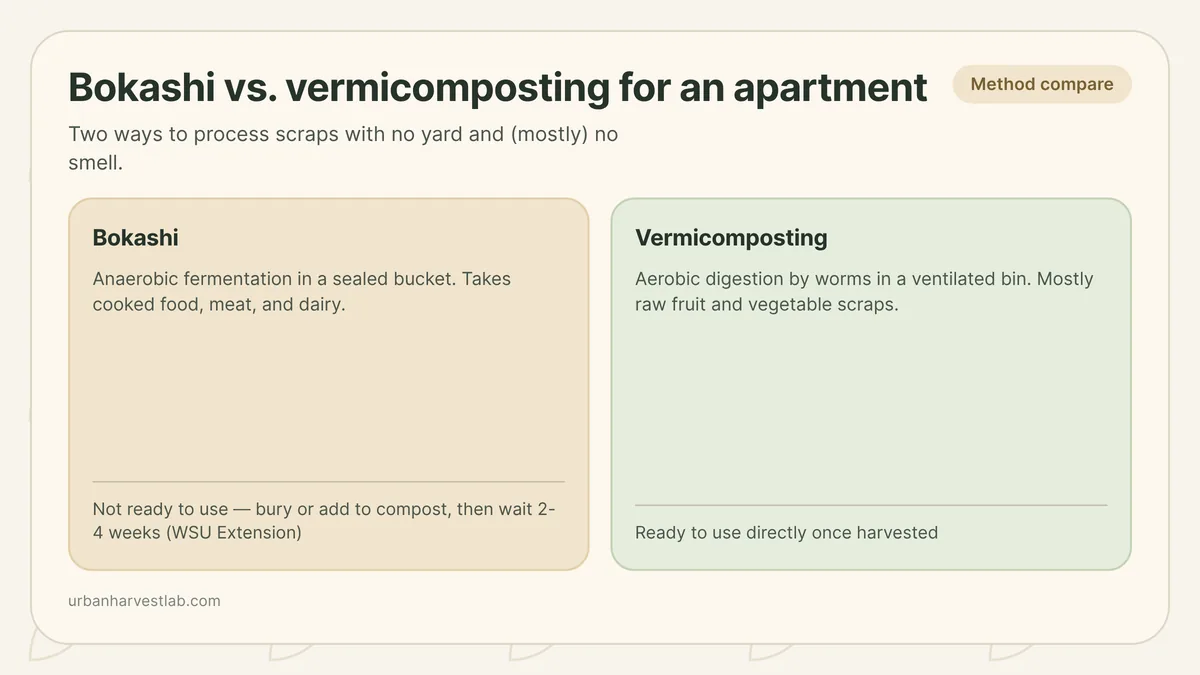
Vermicomposting and bokashi both fit an apartment, but they are not the same process, and they don’t substitute for each other cleanly. A worm bin is a living system: redworms digest scraps continuously inside moist bedding, and the output is finished compost you can use right away. Bokashi is fermentation, not digestion — scraps are layered with an inoculated bran in a sealed, airtight bucket and left to ferment for about two weeks, and Washington State University Extension is explicit that the material still is not finished compost — it has to be buried in soil or added to an active pile and given another two to four weeks before it is usable.
If you want an ongoing system that hands you ready-to-use castings on a rolling basis, a worm bin is the more direct route. If you don’t want to keep worms alive, or you need to process scraps that worms handle poorly — small amounts of cooked food, for instance — bokashi’s sealed-bucket process is worth comparing before you commit to either one.
Sources
Running a worm bin? Also read
These guides cover what to do with the finished castings and the fermentation alternative to a living worm bin.
Common questions
Does a worm bin smell in an apartment?
A properly managed bin should not. University of Maryland Extension traces bin odor to overfeeding specifically, too many scraps added at once, and its fix is to remove the rotting material and pause feeding for about a week rather than add anything to mask the smell.
How big should an apartment worm bin be?
University of Maryland Extension describes a working bin around 21 by 15 inches and 5 to 8 inches deep, handling 2 to 3 pounds of kitchen scraps a week. Scale the footprint to how many scraps your household actually produces rather than buying the largest bin available.
What worms should I use for an apartment worm bin?
Redworms are the standard choice. University of Maryland Extension gives 500 to 1,000 worms per pound as a working population, and a pound of worms consumes roughly a pound of raw scraps daily once the colony is established, so start with less food than that until the population catches up.
How long until a worm bin produces usable castings?
University of Maryland Extension puts a noticeable amount of vermicompost at 6 to 8 weeks in, with a full harvest cycle every 3 to 4 months. Harvest by moving fresh bedding to one side and letting the worms migrate over, or by dumping the bin and scraping off the light-avoiding worms in repeated passes.
Related guides
Bokashi composting for apartments: from sealed bucket to finished soil
Bokashi ferments food waste in a sealed, airtight bucket instead of decomposing it in the open, which is why it works in an apartment with no yard and no smell. The ferment still has to finish breaking down before it feeds a plant.
Worm castings in a container mix: what they do and how much to use
Worm castings are a modest, slow-release amendment, not the cure-all the bag copy suggests. Here is what the extension research actually supports and the ratio to mix them at.
How to make potting mix for container vegetables
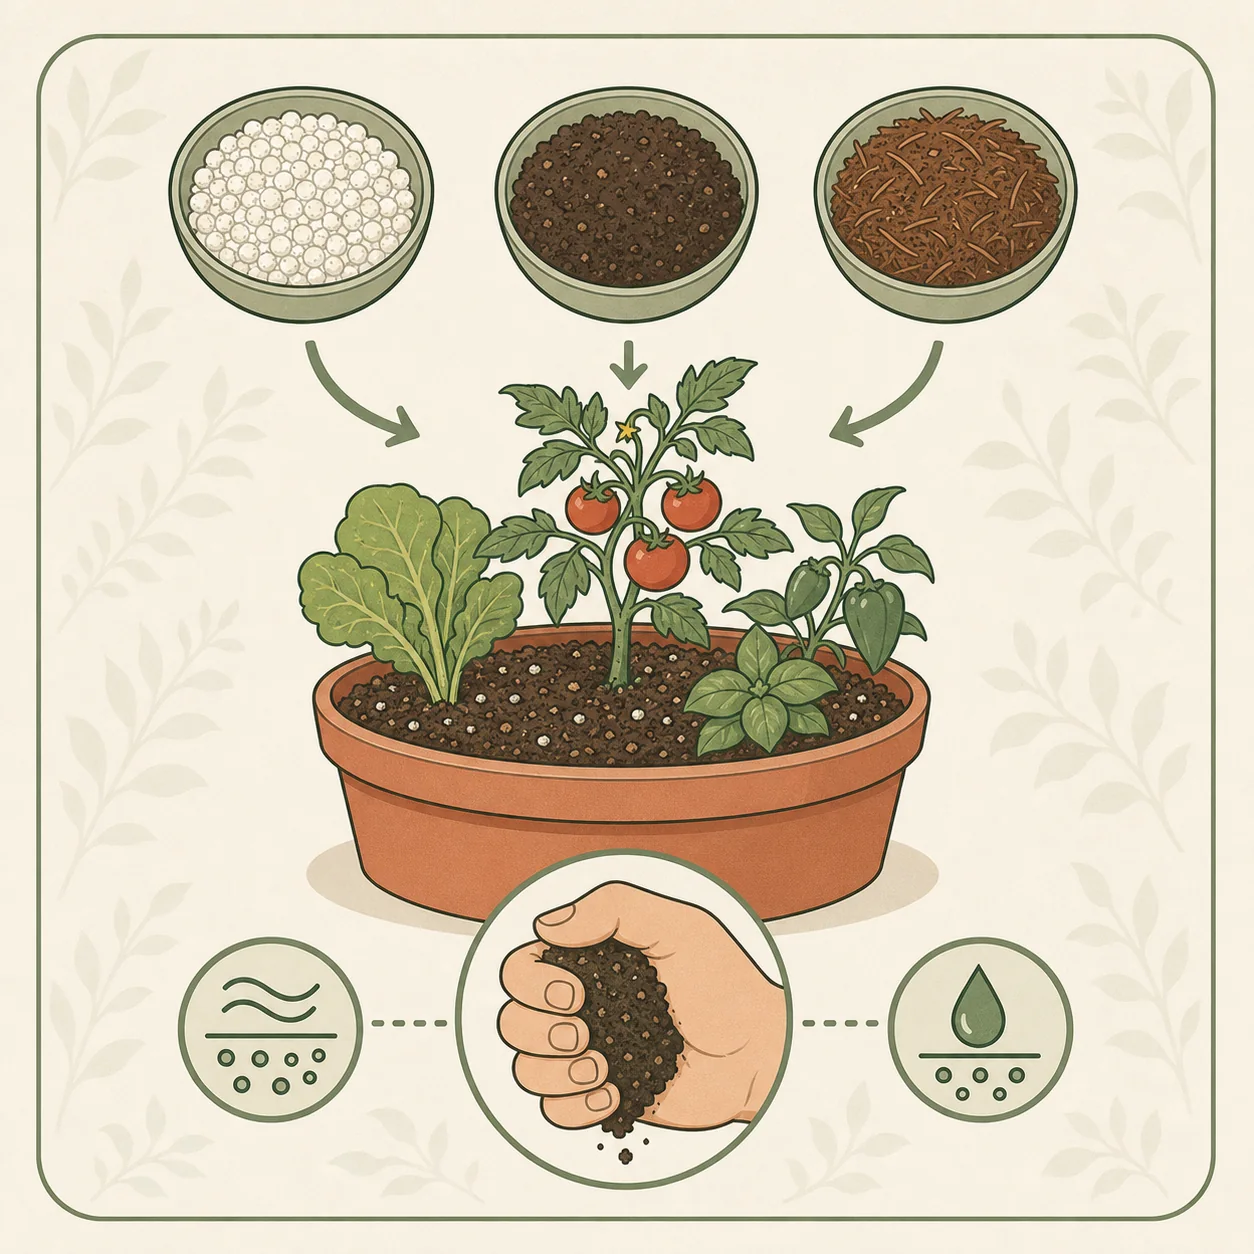
A useful potting mix recipe describes the job of each ingredient and gives you a way to correct the result. The goal is stable air and moisture, not a magic ratio.