
Seed-to-seedling light setup at a glance
| Stage | What the light should do | Watch for |
|---|---|---|
| Before germination | Off, or simply not the priority yet | Warmth and steady moisture matter more than light here |
| Emergence | On, as soon as the first shoots appear | Waiting a day or two to switch it on is the most common early mistake |
| First few weeks | 12 to 16 hours a day on a timer | A skipped dark period stresses seedlings as much as too little light |
| Ongoing growth | Raised every week or so | Stretching means the fixture is too far away or too weak, or the growing area is too warm |
| Before transplant | Gradually replaced by real outdoor conditions | Hardening off, not the grow light, takes over from here |
Seedlings under a grow light need four things in sequence: nothing until they emerge, then light on a fixed daily schedule, a fixture kept close and raised as they grow, and a gradual transition back to real sun before anything moves outside. Get the sequence right and the fixture itself matters far less than most beginners assume. For the exact distance to use at any given moment, the grow light distance guide for seedlings covers the measurement workflow in full.
What to put seedlings under, and why adjustable height matters more than power
A full-spectrum LED shop light, a dedicated seedling panel, or even a decent fluorescent shop fixture will all grow a tray of seedlings competently. What actually separates a good setup from a frustrating one is not wattage or a spectrum claim printed on the box — it is whether the fixture’s height is easy to change.
Seedlings grow fast enough that the correct distance this week is wrong next week. A light clamped at a single fixed height, or hung from a hook with no slack, forces you to either leave it too far away as the tray fills in or take the whole thing down to adjust it. A hanging fixture on adjustable cord, a light bar on a rack with several peg positions, or a simple stack of books under the tray all solve the same problem from opposite ends: make the gap between light and leaf easy to change often, because you will be changing it often.
Fixture type has real trade-offs in heat, running cost, and lifespan, which the LED versus fluorescent comparison covers directly. For a shelf or a windowsill where space is the constraint rather than budget, see the best grow lights for small apartments. None of that changes the sequence below — it only changes which fixture you are raising and lowering.
One fixture covering the whole tray is usually simpler than several small clip-on lights aimed at different corners, mostly because a single light is easier to raise evenly. If a tray outgrows one fixture, one grow light or several covers how to keep coverage even across the seam.
Hold off on the light until seeds actually germinate
Most seeds do not need light to germinate. Iowa State University Extension’s seed-starting guidance and the University of Massachusetts Amherst’s fact sheet on seed starting both describe germination as a function of warmth and consistent moisture in the medium, not light exposure. Iowa State puts most seeds germinating at a soil temperature between 68 and 86°F, with each species having its own optimum inside that band — the closer the medium sits to it, the faster emergence comes. A humidity dome holds moisture and warmth steady, which is what germination depends on. The exception is on the seed packet: Iowa State’s rule is to cover seed to one or two times its diameter and surface-sow anything that needs light to germinate, so check before assuming yours is in the majority.
That means the grow light is not doing anything useful during the days a tray sits waiting to sprout. It is not harmful to leave it on, but there is no reason to run the fixture, and no reason to worry about distance or photoperiod, before you see the first pale loop of a stem breaking the surface. The moment that changes is emergence: as soon as a seedling shows itself above the medium, it needs to be under active light, because a newly emerged seedling with no light source nearby will stretch immediately looking for one. Iowa State and UMass both say to remove the covering as soon as seed germinates — a dome left on over emerged seedlings keeps the air still, which is what encourages damping off.
Check trays daily once you are within the expected germination window for the crop, and move a tray to the light the same day it emerges rather than on your next scheduled check. A few hours of no light after emergence rarely wrecks a seedling; a few days does more visible damage than it needs to. Different crops in the same batch will not emerge on the same day, so it is normal to be running a light over half a tray of seedlings while the other half is still covered and waiting — treat each tray, or each section of a tray, on its own timeline rather than waiting for every cell to catch up.
Set a photoperiod, and put it on a timer
Once seedlings are up, Illinois Extension’s guidance on troubleshooting seed-starting problems puts the target photoperiod at roughly 12 to 16 hours of light a day. That range gives seedlings enough total light exposure to grow compactly while still preserving the dark period that plants use for other parts of their growth cycle — running a light for 24 hours does not make a stronger seedling, it just removes the rest period.
The part that actually determines whether this works is not the number of hours you choose inside that range. It is whether the schedule holds every single day. A seedling under lights for 14 hours on Monday, 9 hours on Tuesday because you left the house, and 16 hours on Wednesday to compensate is getting a worse outcome than one held at a flat 13 hours the whole week, because irregular light is what produces uneven, stretchy growth on top of whatever distance problems already exist.
This is the one place in seed starting where an inexpensive accessory outperforms a habit. A basic outlet timer removes the schedule entirely from your memory, and once it is set correctly it does not care whether you are traveling, asleep, or simply forgot. If you already run lights for mature herbs on a schedule, the same 12-to-16-hour logic carries over almost unchanged from seedling trays to established plants — the fixture and the distance are what change as the crop matures, not the daily hours by much.
Set the timer once seedlings emerge and leave it alone for the rest of the tray’s life indoors, rather than nudging the hours up or down every few days in response to how things look. If growth still seems off after a stable week or two on a fixed schedule, the fix is distance or fixture strength far more often than the number of hours. Running a fixture for weeks at a time also adds up on a power bill; if that matters to you, the electricity-cost breakdown walks through estimating it from the wattage and hours you are actually running.
Keep the light close, then raise it as seedlings grow
Seedlings generally need the fixture much closer than a full-grown plant does, and closer than most beginners expect. University of Minnesota Extension recommends keeping lights roughly 4 to 6 inches above seedlings, raising the fixture as the plants gain height so that distance stays roughly constant. Illinois Extension describes fluorescent tubes specifically being kept closer still, around 2 to 4 inches above the canopy, and in some of its seed-starting guidance recommends positioning the light as close as the fixture allows — citing about 5 inches as a practical starting point.
Read across those figures and the working range is about 2 to 6 inches, not one universal number. What moves it is the fixture itself: a low-heat LED bar can sit at the closer end of that range without any risk of leaf damage, while a fixture that runs warmer needs more clearance to avoid drying out or bleaching the newest leaves. Rather than locking in a single number, treat that as the general zone to work in, and use the full seedling distance guide to set and verify the actual working distance for the fixture you own.
The discipline that matters more than the exact inch count is raising the light on a schedule of your own, not waiting for a problem to force your hand. Check height weekly, or any time a tray visibly gains an inch or more, and move the fixture up rather than letting the canopy grow into it. Trays at the edge of a footprint are worth checking separately from the ones in the middle — a bright center reading can hide a weaker edge that is quietly stretching while the rest of the tray looks fine.
Too close causes a different problem than too far, and it is worth recognizing on its own. A fixture running warm, sitting right against the topmost leaves, can bleach or curl the newest growth and dry out the surface of the medium faster than you are watering it. If you see that pattern directly under the lamp while the rest of the tray looks normal, raise the light rather than assuming the tray simply needs more water.
Read the seedlings, not just the ruler
Distance and hours are inputs. The seedlings themselves are the actual feedback loop, and three signs matter most.
Legginess is the single most useful symptom to know. Illinois Extension’s troubleshooting guidance describes it plainly: when the light source is too far away, seedlings stretch, producing a long, thin, and structurally weak stem as the plant reaches for more light than it is getting. UMass Amherst puts temperature beside light in the same sentence: seedlings stretch and go leggy without enough light, or if the growing area is too warm. Check the temperature around the tray before assuming the fixture is the problem, and see grow light heat management if the shelf runs warm. A leggy seedling rarely recovers its shape on the stem it already grew — once heat is ruled out, the fix is to close the distance or extend the hours, then judge the next set of leaves rather than expecting the existing stretch to reverse.
Pale or washed-out color is the second sign worth watching, though it is less specific than legginess. Seedlings that look pale rather than a healthy green are often under-lit, but the same look can come from cold growing conditions, overwatering, or a medium that has run out of the nutrients a seed’s own reserves provided. Treat pale color as a prompt to check the whole setup, not proof that the light alone is the problem.
Leaning is the third, and it usually has a simpler explanation than the other two: seedlings bend toward whatever light source is strongest and most consistent. If a tray sits near a window as well as under a grow light, uneven leaning toward the brighter side is normal plant behavior, not a fixture failure. Rotating the tray, or relying on the overhead light as the dominant source rather than mixing it with a weaker window contribution, usually straightens new growth within days.
Keep water and electronics apart
Seed trays involve standing water, humidity domes, and mist right underneath an electrical fixture, which is a combination worth taking seriously even in a small home setup. Keep the tray raised and centered under the light rather than at its edge, where a dome shedding condensation or an overfilled saucer is most likely to run toward a cord. Water the tray itself rather than misting directly under a powered fixture. The full picture of keeping a powered shelf and water apart is covered on grow light safety.
Harden off before anything goes outside
A seedling grown entirely under a steady, indirect grow light has not experienced direct sun, wind, or the temperature swings of the outdoors, and moving it straight from a shelf to a garden bed on the same day usually scorches or wilts it. UMass Amherst’s seed-starting fact sheet puts hardening off at about one week before planting out: a gradual, increasing dose of outdoor conditions rather than a single abrupt move, starting with a short stretch in a sheltered, shaded spot and building up direct sun and time outside each day.
The grow light’s job effectively ends once hardening off begins. From that point, outdoor light and weather are doing the work the fixture was standing in for.
Pick the start of that stretch for mild, calm weather rather than a windy or unusually cold day. UMass also has you reduce watering to a minimum during that week, without letting the plants wilt — the point is to toughen the seedling before it goes into ground you cannot water as closely as a shelf. Once it is spending full days outside without wilting or leaf damage, it is ready to go into its final spot, whether that is a container, a bed, or a hydroponic system picking up where the grow light left off.
Sources
- University of Minnesota Extension — Lighting for indoor plants and starting seeds
- Illinois Extension — Supplemental Lighting for Indoor Seed Starting
- Illinois Extension — What’s wrong with my seedlings? Troubleshooting seed starting problems
- UMass Amherst Center for Agriculture — Starting Seeds Indoors: Caring for Your Seedlings
- Iowa State University Extension — How to Successfully Start Seed Indoors
Get the rest of the seed-starting setup right
These guides cover the exact distance workflow, timer choices, and fixture comparisons that build on this setup.
Common questions
Do seeds need a grow light to germinate?
Most vegetable and herb seeds germinate using warmth and moisture, not light. Turn the light on once seedlings actually emerge, not before.
How close should a grow light be to seedlings?
University of Minnesota Extension gives 4 to 6 inches above seedlings and Illinois Extension keeps fluorescent tubes at 2 to 4, so the working range is roughly 2 to 6 inches depending on the fixture and how much heat it puts off. Measure from the top of the canopy and adjust from there rather than trusting one fixed number.
How many hours a day should grow lights run for seedlings?
About 12 to 16 hours a day once seedlings have emerged, run on a timer rather than a manual switch so the schedule does not slip.
Why are my seedlings leggy under a grow light?
Usually the fixture is too far away or too weak for the tray. UMass Amherst names a second cause worth ruling out first: seedlings also stretch if the growing area is too warm. Check both, then judge the next set of leaves rather than the stem you already have.
Related guides
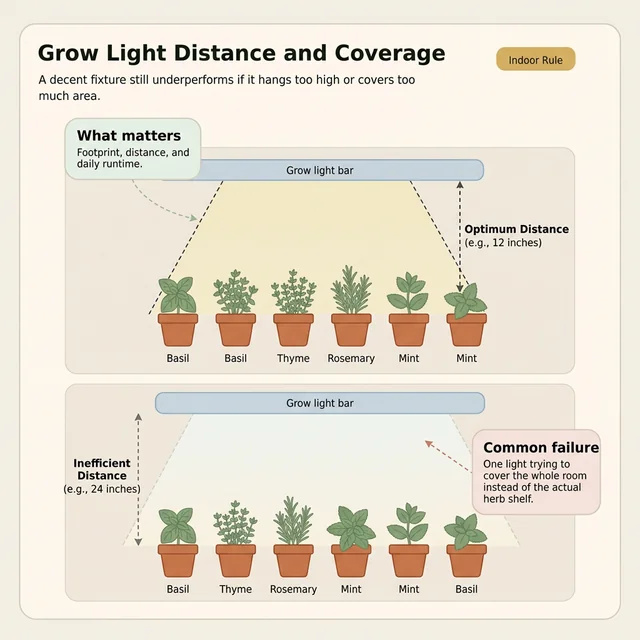
Grow light distance for seedlings: how close is too close?
Seedlings usually need grow lights much closer than beginners expect, but the exact distance depends on fixture strength, lens design, and plant response.
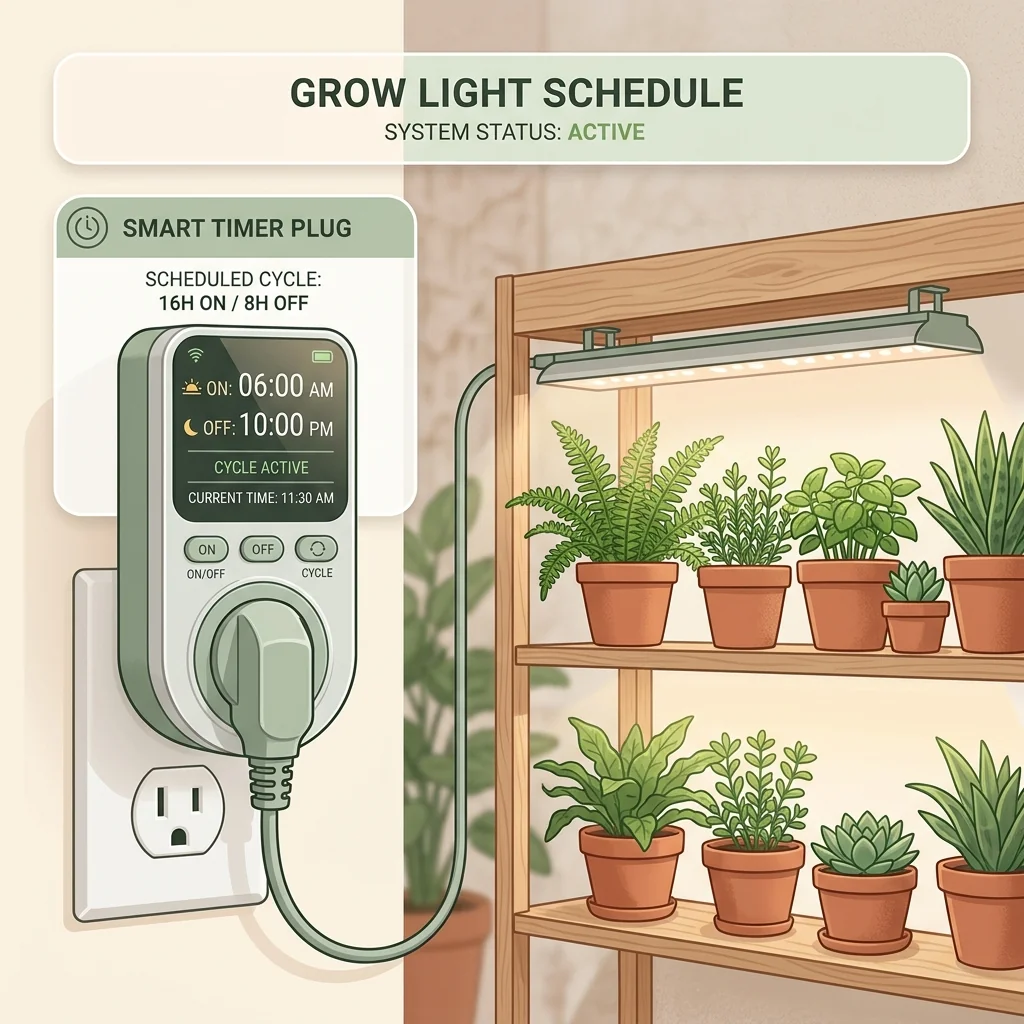
Best grow light timers (buyer's guide)
Consistency is everything in indoor horticulture. If you forget to turn your grow lights on, your plants will starve. If you leave them on too long, your greens will stress and bolt. Automating your photoperiod with a reliable outlet timer is the single easiest upgrade you can make. Here are our top picks.
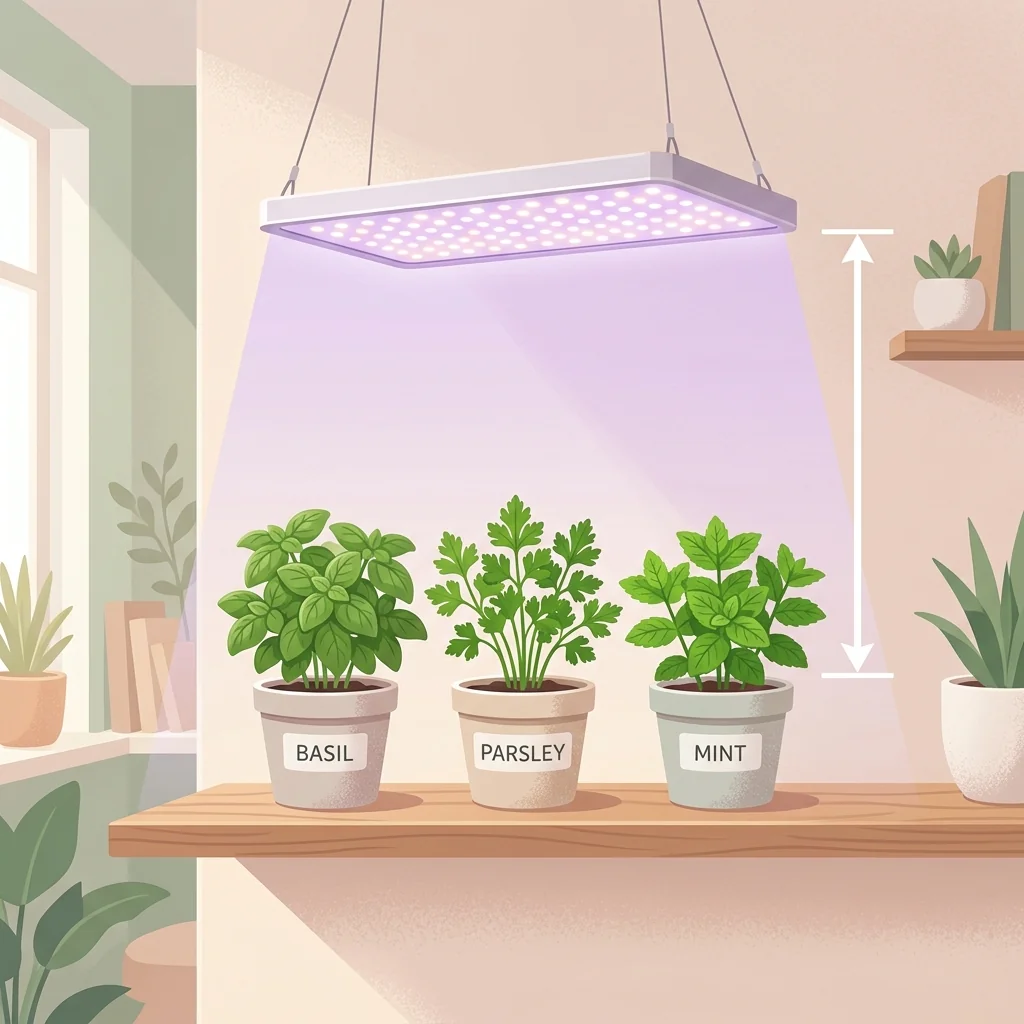
How to grow herbs indoors under a grow light
A grow light lets you grow herbs indoors anywhere, even with no sun. Here is the simple end-to-end setup: which light, how high, how long, and how to avoid leggy growth.